This post contains affiliate links and I will be compensated if you make a purchase after clicking on my links.
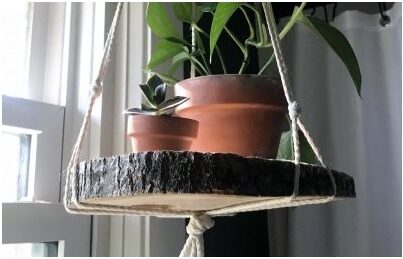
This DIY hanging planter hits all the bohemian feels, with the macrame rope, natural wood and terra-cotta pots. It will only take you an hour to put together but draw your eye in any room. The natural simplicity and availability of materials makes this DIY a must for any indoor gardener. This one I hung in my bathroom that I am refurbishing check my progress here.
Collect Your Supplies

- different sized terra cotta pots
- macrame rope
- 2″ thick cookie of wood from downed tree
- power drill
- hole saw kit


CLICK ON ANY IMAGE ABOVE FOR EASY SHOPPING TO MAKE YOUR OWN DIY PLANTER
Drill Your Holes

First step to making this hanging planter is drilling your holes. Start by matching up your drill bit to the bottom of your pot to get the closest fit. It will work best if the drill bit is slightly larger than the base of your pot. Once the hole is formed the pot with rest inside the hole and sink in a little for a more secure fit.
To apply a hole saw kit to your power drill, first make sure the power supply is disconnected from the power drill. Insert the bit into the hole saw and slide the saw onto the mandrel. The mandrel is the metal filling that holds the bit. Grip the base of the saw with one wrench and the base of the drill with another to tighten.
Clamp your cookie (circular slice of wood) to your work surface and drill your holes through the wood. Depending on the strength of your drill and the hardness of the wood it may take a little pressure to get through. Your bit will get hot to the touch so don’t burn your fingertips.

Protecting Your Wooden Planter
Depending on where you are planning to place your hanging planter you may have to protect your wood. This one is going into this bathroom right next to the shower, so it needs protection from the dampness. I apply pre-stain or wood conditioner, before staining or sealing any wood.

After 10 minutes pre-stain is applied it’s time to apply 3-4 coats of polyurethane. First coat should be thin and allowed to dry thoroughly. The following coats can be applied with drying thoroughly between each coat. Drying time depends on polyurethane product and the humidity in the air. Apply your polyurethane according to the directions on the can.
Macrame Tying
There are a variety of macrame cords available at craft stores that come in a variety of colors. Use 3 lengths of rope for the macrame hanging planter cut to 6 feet in length. Your length will depend on the height of your ceiling and width of your cookie. Cut the rope longer than you think you will need, you can always cut away any excess.

Overlap the cords and tie a simple knot at the end, this is what will attach to your ceiling hook.

Separate the cords into 3 sets of 2 and tie a simple knot to hold each of the sets together.

Gather the end of the rope leaving plenty of length to trail under the planter. Tie your final knot. Hang your planter inside the ropes. Don’t put your pots into the planter until it’s at the height you want. I liked the look of opening up and fraying the fibers. If the strings are uneven feel free to give it a trim.
Enjoy Your New Planter
Place your plants into the holes in your new planter. I sealed my holes on the bottom of the pots to prevent dripping when they get watered. Just made sure there was a layer of rocks in the base to allow for good drainage. Then sit back and enjoy your beautiful new planter!


