This post contains affiliate links and I will be compensated if you make a purchase after clicking on my links.
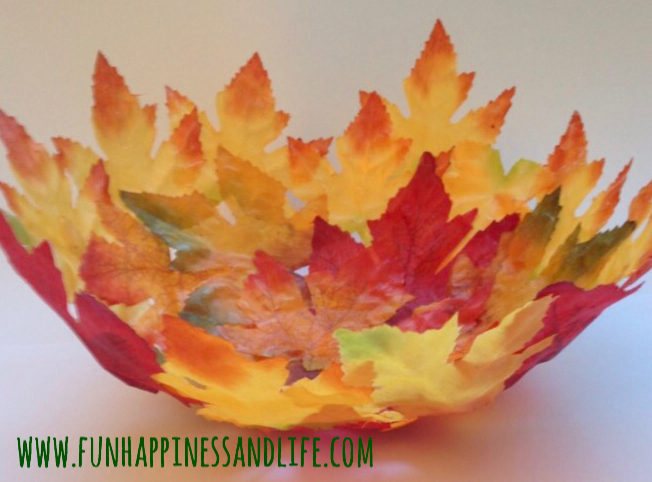
Happy November everybody! I have an easy quick DIY to make this delicate leaf bowl.
My mind is still having difficulty believing it is November since my son is wearing SHORTS to school again today. Here in Wisconsin it is usually frosty and possibly snowing. Weird. I had to remind myself that Thanksgiving (which I am hosting) is just two short weeks away. In a lead up to this autumn holiday, I am pulling out all my decorations and unearthed this one I made last year.
I was inspired to write this post as a result of an Instagram challenge I am in, called No Place Like Home November (2016). I posted a picture of my leaf bowl which was holding my old wine corks, and got nice responses on how much people liked it. So I thought I would throw together a little DIY how to, so you could create your own. If you want to jump onto the November 2016 Instagram Challenge check out The Aspiring Home. They have a new picture challenge per day. It’s been great seeing all the lovely fall pictures!
DIY LEAF Bowl Supplies
 You will need just a little bit of space to create this, so clear off your table and lay down a sheet of paper to protect your surface. I gathered my Fabric Modge Podge
 glue and Mod Podge Acrylic Sealer
. You could use a standard Mod Podge
if you don’t have the fabric type. I used fabric because the leaves I had were fabric in nature. A brush to apply the glue and a balloon to shape the bowl. The leaves I had were from the local dollar store.
Shop For Floral Supplies, Decor, Vases and More All At $1!
If you have leaves with stems and plastic veins I would remove them, they will hamper your ability to from them around the balloon.
Lets Get this Leaf Bowl Started
 Blow up the balloon to the size you want and rest it in a bowl so it doesn’t roll away from you with the knot facing downward. Apply a thin layer of Modge Podge on the balloon. Glue the leaves to the bowl, and then brush another layer on top of the leaves. Allow to dry for a couple minutes for the base.
Work your way down the balloon until you get the size of bowl you desire. I went back and placed a few extra leaves on the base of the bowl to help with reinforcement. Make sure you covered all open areas. Using a balloon that is a different color from your leaves will allow you to easily see the missed areas.
Allow the leaves to dry for at least 1 hour. Go outside and rake or whatever. I have to do something that takes me away from the project or I will jump the gun! AFTER the glue has dried, pop the balloon and allow the air to go out. The bowl will shrink down a bit, don’t worry it will bounce back. Gently pull off the balloon from the leaves.
Make It Monday
I loved how this bowl turned out and wanted it to last longer than one year, so I sprayed it with a layer of the Modge Podge acrylic sealer. This gave it a nice shine and also seemed to strengthen the form slightly.
This is a delicate bowl, it will not hold your car keys (I tried). It’s a great place to collect your wine corks until you use them for another craft!
I hope you enjoy this quick Make It Monday craft project. If you are looking for kid friendly activities check the crafts I did with my kiddos for autumn.


Beverly
What a clever idea. So cute and creative.
Bev
Kim Amy
Thanks Bev, it was fun to put together, thought it wasn’t going to work about halfway through it. Glad it did, my wine corks love it!